Showing posts with label Crafts. Show all posts

Wednesday

Olympic Glove Love

I saw THESE Spirit Fingers
a while back,
and knew I wanted to make some for my girlies.

But I needed a good reason-
a reason that they would need to cheer someone on.
Well, cheering on the good old USA
during the Sochi Olympics
seemed like a great time for these
Spirit Fingers,
so I whipped up a couple of pairs.

Here's how I did it:
1.  I gathered up three different colors of yarn.

Mine were also different textures,
to give the pom poms an "artsy" feel.
 2.  Using all three strands of yarn,
I wrapped them around two of my fingers 
five times.
 3.  I then cut the three yarn stands
off of their yarn balls
and slipped the loop of yarn off of my fingers.
 4.  After laying the yarn loop on to of a single piece of yarn...
...I tied the single strand around the middle of the loop.
 5.  I then used scissors to cut apart the loops
on either side of the knot...
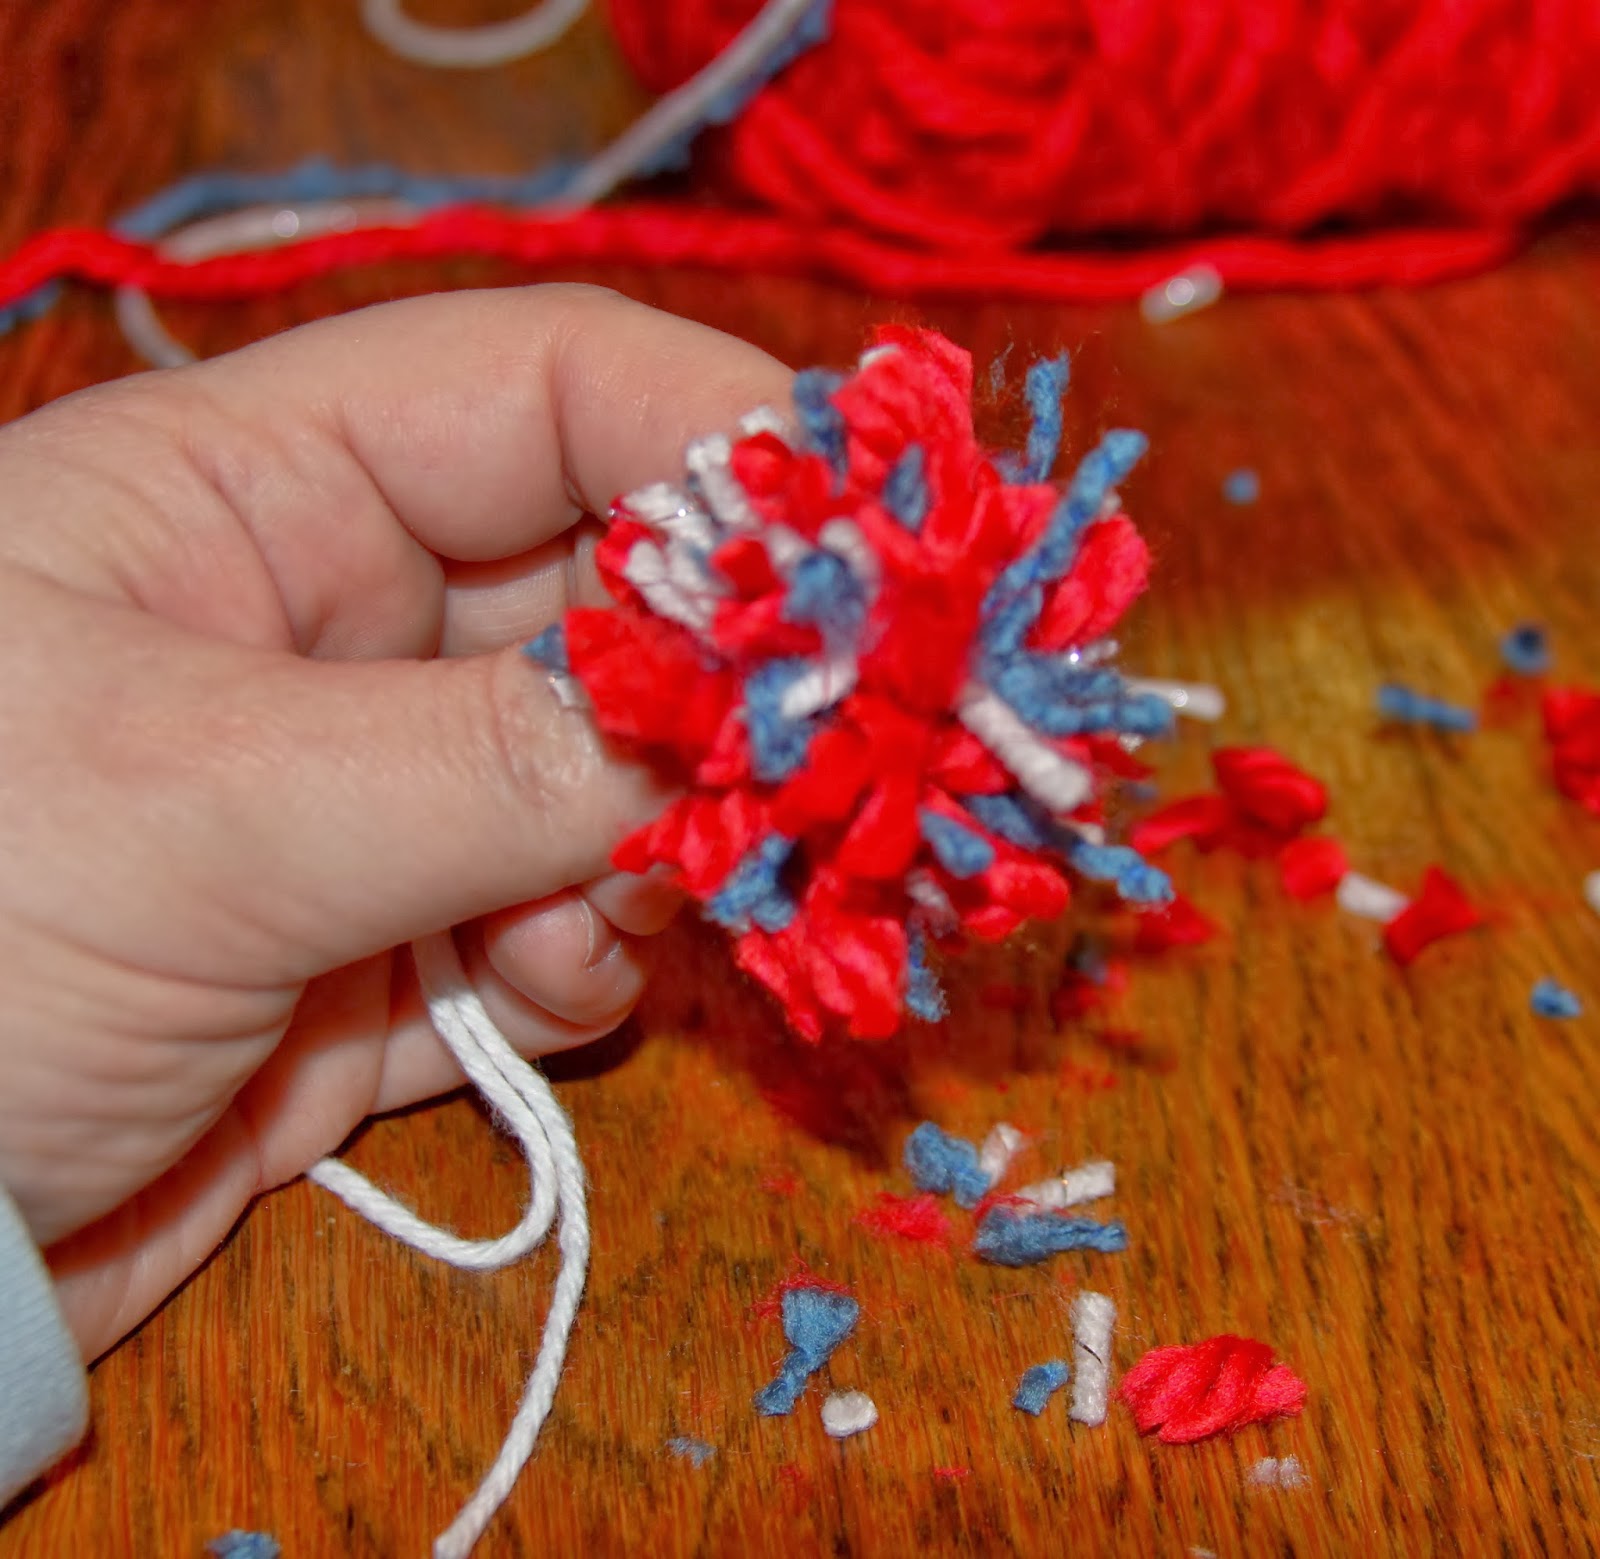
 ...and trimmed the yarn until I had the look
I wanted for the pom pom.
6.  After I made ten pom poms,
I used the tail from the single strand tied around the loop
to sew each pom pom onto separate fingers of the gloves.
There ya have it!

Spirit Fingers to use during all of those
"USA!  USA!  USA!"
Olympic chants! 


***

Linking up at the

Saturday

Olympic Shrinky Dink Swag

This past week,
the kiddos and I
(and some friends)
have begun getting ourselves in the
Olympic-spirit.

I hope to share several of these activities
over the next week,
so you too can get in an
"Olympic-kind-of-mood"...

***

After using the Russia PowerPoint
found HERE,
I read the kiddos
by
Corinne Demas Bliss.

We discussed how Sochi is located in Russia,
and how their culture will be a big influence

I then discussed the trading pins
(aka "swag")
that people acquire at events of this nature.
My challenge for the kiddos was to
create their own swag
based upon images that will be used
during this Olympics.
Personally,
I would have created a 
Matryoshka Doll
with an Olympic emblem on it...
...but the kiddos were drawn to the other images
I had found on  line and printed off
for them to look at.

(You can find several of these images,
such as the Sochi mascots and the pictograms
The kiddos used colored pencils to trace
them onto Shinky Dink plastic sheets.
Then decorate their images using the colored pencils
and black permanent marker.
(Some of the kiddos created their own original images...)
 We baked the sheet saccording to the package directions.
When they cooled down,
we used E6000 to glue pin backs on the images.

After they dried a bit...
...they kiddos now have their own
swag to wear...
...while watching the Olympics!

***

Linking up
with
and the

Monday

Back-to-School Bookworms

For the past few years,
our neighborhood has hosted a
"Back-to-School Breakfast"
in an effort to get the kiddos
up and out of bed
and excited for the new school year.

I have provided a craft at all of these celebrations.

(You can see the Pencil Toppers we made in 2010
by clicking HERE.)

This year's craft was inspired by
I taught the kiddos how to make my version of...
...Book Worms!

Supplies:

Pip cleaners
Buttons
Pony Beads
Craft glue
Googly eyes

Step 1:
 Decide what color of pipe cleaner you want for the worm's body
and  style of button you want for the worm's head.

Step 2:
 Push the pipe cleaner
through one of the holes of the button.

Step 3:
 Push the pipe cleaner back through
a different button hole.

Step 4:
Twist the small section of pipe cleaner
you looped through the button holes
over and around the rest of the pipe cleaner.

Step 5:
 Thread the pipe cleaner
with pony beads
to decorate the worm's body.

Step 6:
 To close off the end,
leave some of the pipe cleaner un-beaded,
and pull up the last pony bead a bit.
Loop the end of the pipe cleaner
over the extra pony bead...
 ...and twist it around the extra bit of pipe cleaner...
...to create a close off tail end.

Step 7:
Use craft glue to secure eyes on the button face
and you have yourself a book worm!

I loved watching the creative minds
of the kiddos at the breakfast...
They came up with all different kinds of book worms-
not one was the same!

Wednesday

Despicable Me 2 Week: Evil Minion Target Practice

After seeing
Despicable Me 2,
I KNEW we had to somehow include the...
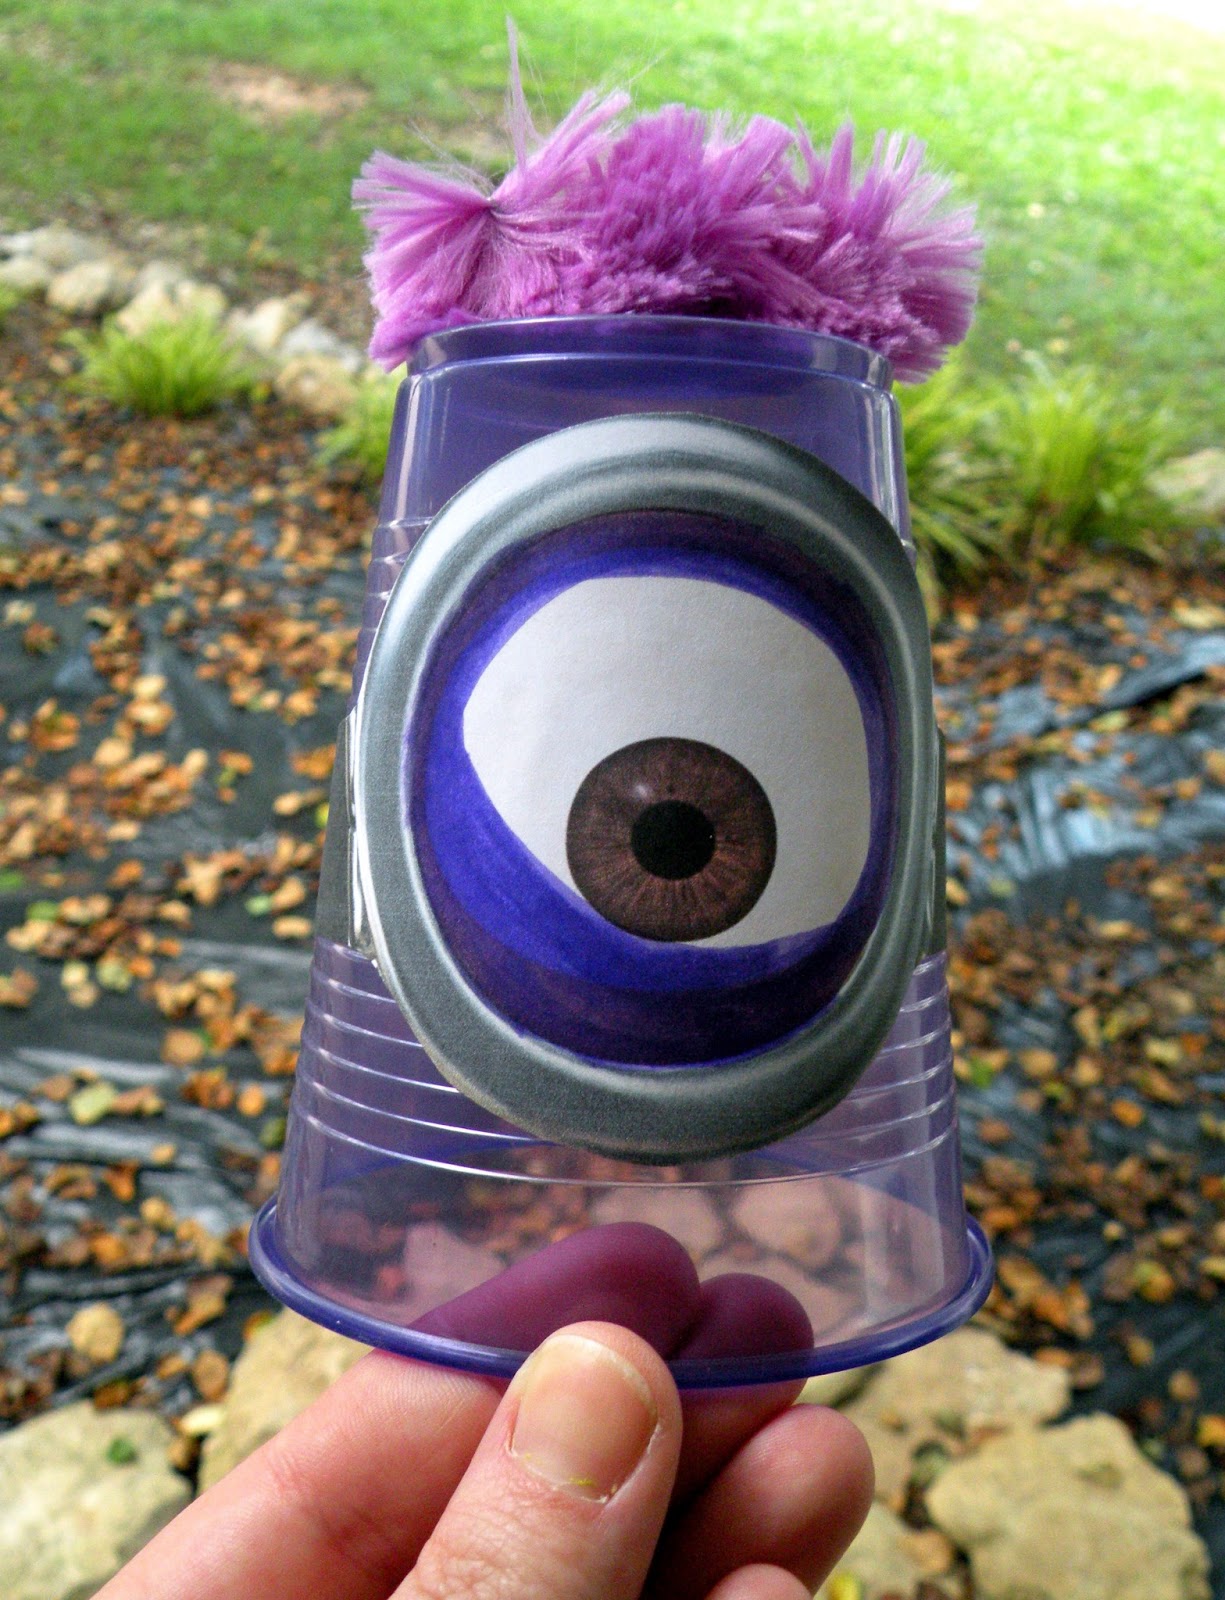
...the Evil Purple Minions in our week of
learning fun.

So,
I was inspired to create a game
based on the idea of air pressure when I found...
...these air rocket launchers at Wal-Mart
in the clearance section.

I then bought some purple cups at
(where else)
The Dollar Tree...
...and purchased
THESE Minion goggles printouts
to create...
...a cup tower of
Evil Minions.

(I had to color the inside of the goggles
purple since the originals are yellow,
as well as added parts of a fluffy purple pipe cleaner
to the back of the cups.)

The kiddos then practiced the power of air pressure
by firing their launchers at the tower,
trying to knock down as many minions
as they could in the process.
Now,
if I had been on top of my game,
I also would have made the kiddos watch
so we could have deepened our knowledge 
about air pressure.

But alas,
I was not thinking far enough ahead
to secure a couple of this 
Magic School Bus episode.

Hopefully, though, I will soon be able
to purchase...
...The Magic School Bus:
The Complete Series
soon, so I will never find myself missing out
on furthering the kiddos' education.

(In fact, it is on sale right now over on Amazon-
Woo-hoo!)

Since the kiddos did not knock down many minions
with the air rocket launches,
I let them get out the balls
and use their own force to knock down to tower-
just like we did during out

In fact,
Little Wild Man found the 
Mike Wazowski cups
we used during that week
and created...
...a gigantic Mike/Minion tower to knock over!

Tomorrow,
I am gonna show ya what rubber gloves
had to do with our
Despicable Me 2 Week,
so please come back and visit!

Christmas in July (Craftaholics Anonymous Homemade Gift Exchange)

I decided to take the plunge and participate in
Handmade Gift Exchange Summer 2013.

I have been getting my crafty on
in recent months,
so this seemed like a great activity to participate in-
not only to get great ideas from someone else,
but to also give away some of the crafty goodies
from my Etsy shop,

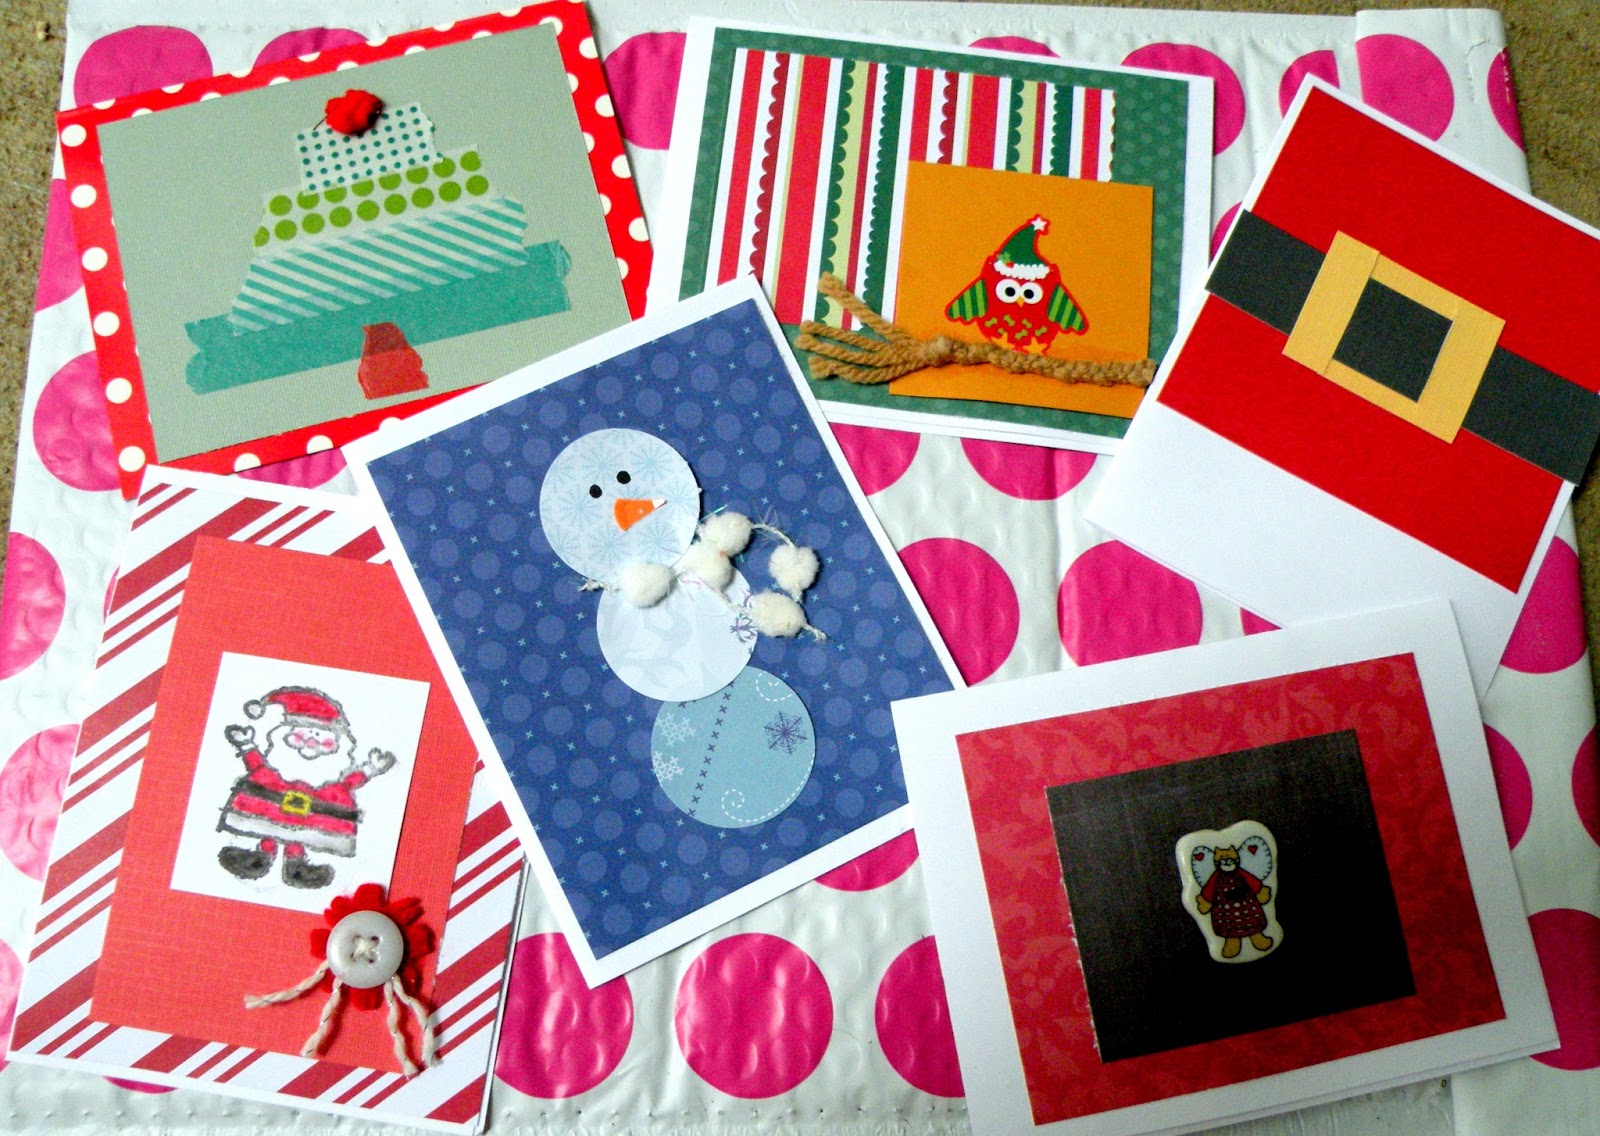
Since I had a lot of Christmas cards made up,
I decided to make a 
"Christmas in July" themed gift pack.

(And since my partner's name is Holly,
I am HOPING she will enjoy the irony...)

The package included:
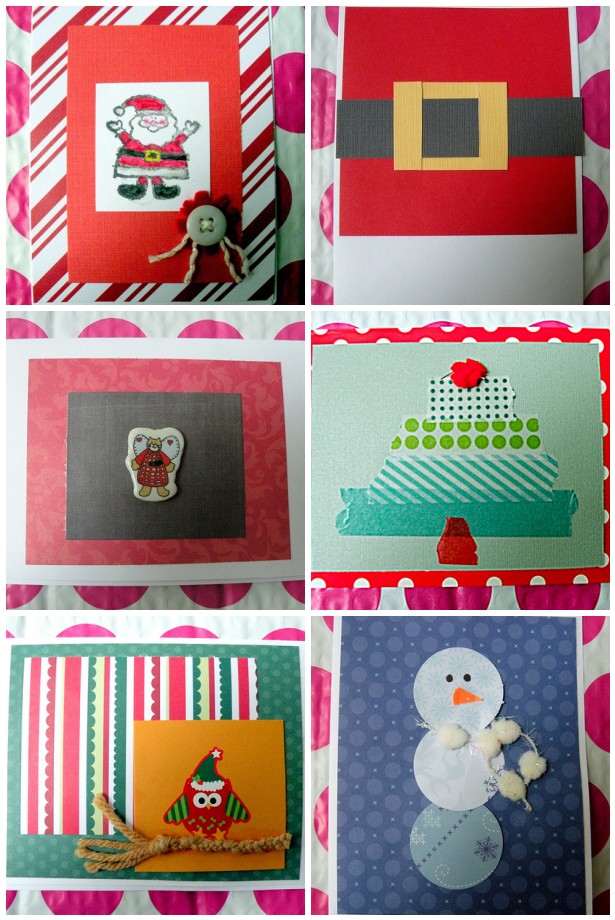
*A variety of handmade Christmas cards
(Here's a closer look...)
*A Christmas colored scarflette
(These colors always remind me of something a
Who from Whoville would wear in
The Grinch...)
*A matching yarn brooch for the scarflette
*Another yarn brooch,
in Winter White...
...which I packaged in a mini Christmas stocking

(And no, I did not make the stocking!) ;0)
 I explained the theme of my package
 with a handmade Summery-colored 
Christmas card...

..and packed everything together with some red tinsel.

And to give a "warning tot eh recipient... 
...I drew a Christmas Tree on the front
of the package.

I hope all these items put her in a
Christmas mood,
inspiring her to get a head start on her
Christmas crafting,
which I know I should be doing right now...

;0)

*************************************

Check out what other crafters 
have pulled together over at the